
In this article:
- Cancel a Client Appointment
- Notify Staff of a Cancellation
- Cancel a Staff Appointment
- Reassign an Unassigned Appointment
- Undo a Cancellation
- Quick Reference
Before You Start
Cancellation reasons and cancellation types are set up at the organization level. To learn how to set up cancellation reasons, click HERE.
Cancel a Client Appointment
- Select [Scheduling] from the menu bar.
- Select [Schedule For] or [Overview].
- Select the client or staff in [Schedule For] and locate the appointment. OR Navigate to the appointment in a filtered view in [Overview]
- Click the appointment to open it.
- Change the status from [Scheduled] to [Canceled]
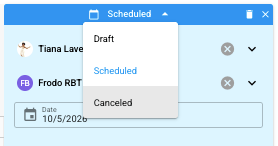
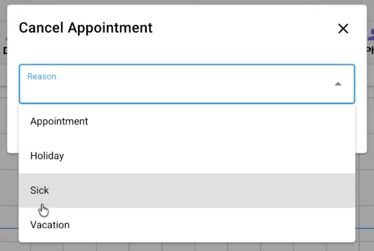
- Select the cancellation reason (for example, Sick).
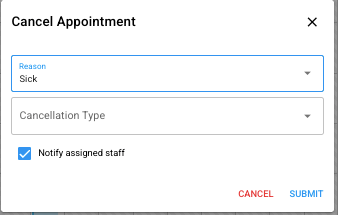
- Select [Client] as the cancellation type.
- Check [Notify assigned staff], if applicable (see below).
- Click [Submit].
- Select [This appointment] to apply the change to this appointment only.
- Click [Save My Changes].
The canceled appointment will appear in red on the schedule and in your cancellation report.
Notify Staff of a Cancellation
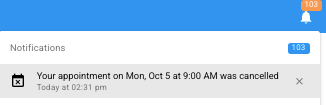
When cancelling a client appointment, check [Notify assigned staff] to let the staff member know their session was canceled.
The staff member will see the notification in the bell icon and in their notifications list in Hi Rasmus.
📹 Watch: Staff Cancellation - Unassigned Appointment Creation
When to Use This Feature
- A staff member calls out sick or is otherwise unavailable for a scheduled session
- The client session still needs to be covered and you are actively looking for a replacement
- You want the session to remain visible on the schedule in the unassigned bucket rather than disappearing from view
Step-by-Step Instructions
Step 1: Navigate to the Overview and Locate the Appointment
- Go to your Overview in the scheduler.
- Use the filter to display your current staff for the relevant time period. You can toggle between week view and day view — day view is recommended when managing same-day coverage.
- Locate the appointment for the client whose staff member is unavailable.
Step 2: Open the Appointment and Set the Status
- Click on the appointment to open it.
- From the status dropdown, change the appointment status from Scheduled to Canceled.
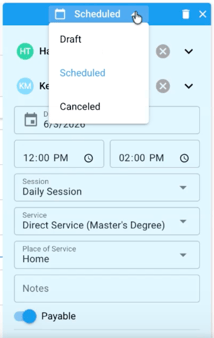
- Select the cancellation reason (e.g., Sick).
Step 3: Select the Unassigned Appointment Option
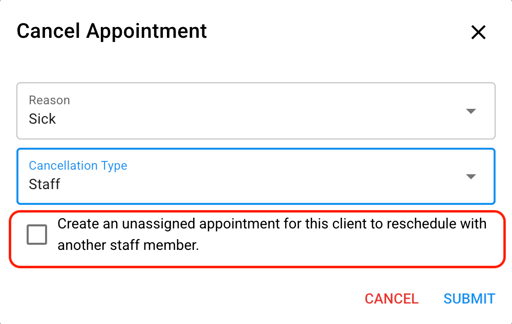
- After selecting Staff Cancellation as the cancellation type, a checkbox will appear: “Create an unassigned appointment for this client to reschedule with another staff member.”
- Check this box if you still need coverage for this session.
Step 4: Submit and Save
- Click Submit.
- When prompted to save, select Save My Changes.
- Important: Apply the change to this appointment only — do not apply to recurring appointments unless intended.
- Click Apply on Calendar/Visualization to confirm.
Step 5: Confirm the Result on the Schedule
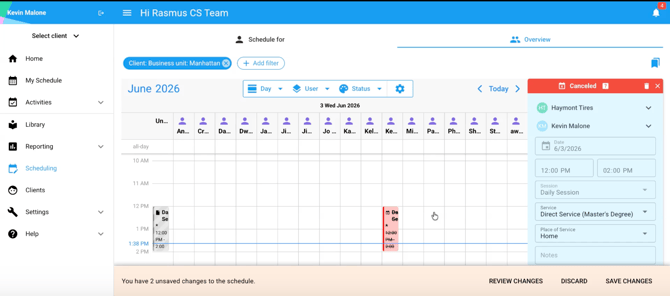
After saving, verify the following on your calendar:
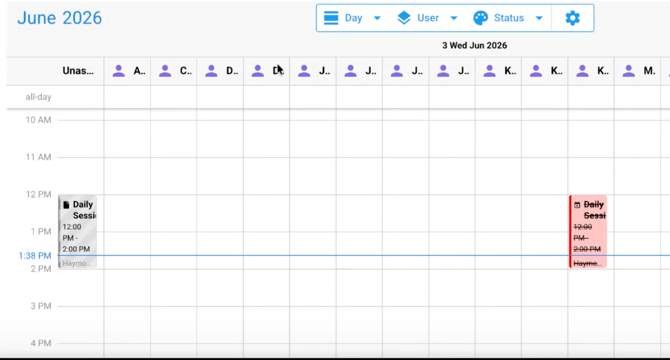
- The original appointment now appears in red, marked as canceled. It will be visible in cancellation reports.
- The client’s name now appears in the Unassigned bucket on the left side of the schedule, indicating that coverage is still needed.
Reassigning the Session to a Staff Member
Once the unassigned appointment is created, you have two options to assign coverage:
Option A: Use the Top Matches Feature
- Click on the unassigned appointment in the Unassigned bucket.
- Select User to view a list of Top Matches — staff members who have worked most frequently with this client.
- Click the checkmark next to a staff member’s name to confirm their availability.
- Assign the session to the selected staff member.
Option B: Drag and Drop on the Schedule
- Review the schedule visually to identify which staff members are available during this time slot.
- Drag the unassigned appointment from the Unassigned bucket and drop it onto the available staff member’s column.
- When prompted, confirm that you are editing only this one appointment (not the recurring series).
**The system will not alert you if a user is scheduled with a client they are not linked to. You may need to manually link your client and user.
Reporting and Documentation
- The canceled appointment will appear in your cancellation report, tagged with the cancellation type and reason you selected.
- The unassigned appointment is separate from the canceled record and will remain in the Unassigned bucket until it is filled or removed.
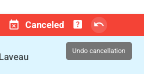
Undo a Cancellation
- Click the canceled appointment to open it.
- Click [Undo Cancellation].
- Click [OK]. The appointment will return to its previous status.
- Click [Save My Changes].
Quick Reference
| Situation | What to Do |
|---|---|
| Client cancels | Cancel → select reason → Client type → notify assigned staff if needed → Submit |
| Staff calls out, session needs coverage | Cancel → select reason → Staff type → check the unassigned appointment box → Submit |
| Coverage found with Top Matches | Open unassigned appointment → User → choose from Top Matches |
| Coverage found visually | Drag unassigned appointment to an available staff member |
| Cancellation was a mistake or plans changed | Open appointment → Undo Cancellation → OK → Save |
💡 Always confirm you’re saving changes for this appointment only, unless you mean to update the whole recurring series.
-Updated October 2026