
In This Article
- About Hi Rasmus Availability and Unavailability Tools
- Setting Up Global Availability
- Setting Up Staff Availability
- Setting Up Client Availability
- Setting Up Unavailability Calendar Blocks
ℹ️ About Hi Rasmus Availability and Unavailability Tools
- Global Availability: Global availability settings allow you to add business hours for your organization so that users who are creating schedules can easily visualize an organization's business hours.
- You can also add organization wide unavailability per day, to account for things such as holidays or org-wide events.
- Staff Availability: Staff Availability can be set up on a staff member's profile, so users creating schedules can easily see when that staff member is and isn't available. Like Client Availability, this is a visual guide and doesn't block scheduling.
- Client Availability: Client Availability can be set up on a Client's profile. When Client Availability is set up, users will be able to easily tell when a client is available for services or not. This acts as a visual guide, but doesn't prevent users from scheduling.
- Unavailability Calendar Blocks: Unavailable blocks can be set up on both user and client calendars. These blocks are easily visualized, can be recurring, have a custom title, and will also give users a warning message if they try to schedule over them. This warning message can be overridden.
📹 Watch: Availability and Unavailability in Hi Rasmus
🛠️ Setting Up Global Availability
Global availability is managed under [Settings] >> [Scheduling] >> [Global Availability]. From here, you can set your organization's business hours or add unavailability events.
Setting Business Hours
- Go to [Settings] >> [Scheduling] >> [Global Availability].
- Toggle on [Business Hours].
- Toggle on each day your organization is open.
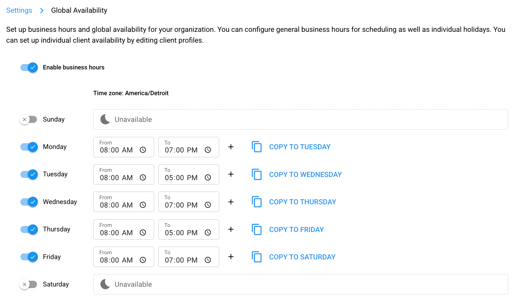
- Edit the hours for each day as needed.
- If your hours are the same across multiple days, use the copy option to apply those hours instead of entering them one at a time.
- Click [Save].
Business hours display on the scheduling calendar in pink/red diagonal line, so users can see your organization's hours at a glance while building schedules.
Adding an Unavailability Event
Unavailability events are date-based and useful for things like holidays or org-wide closures. These are added under the [Global Unavailability] section.
- Go to [Settings] >> [Scheduling] >> [Global Availability].
- Go to the [Global Unavailability] section.
- Click the blue [Add Unavailability Event] button.

- Enter the date for the event.
- Enter a description.
- Click [Save].
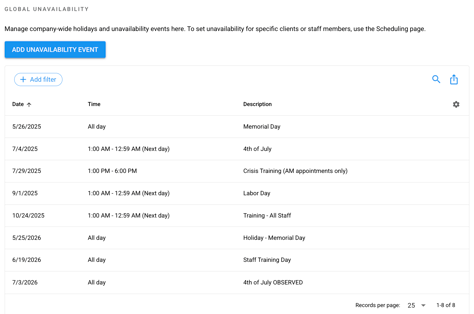
💡 As your list of unavailability events grows, you can use the available filters to find events by date.
🛠️ Setting Up Staff Availability
You can add a staff member's availability in two ways.
Method 1: From the Scheduling Module
- From the [Scheduling] module, click on the staff member whose availability you want to set. This opens their profile.
- Go to the [Availability] tab.
- Toggle on [Enable Availability].
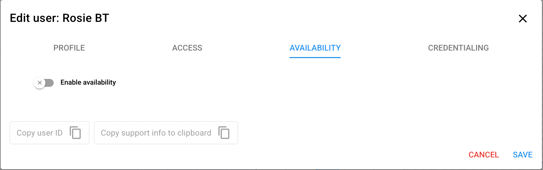
- Toggle on each day the staff member is available.
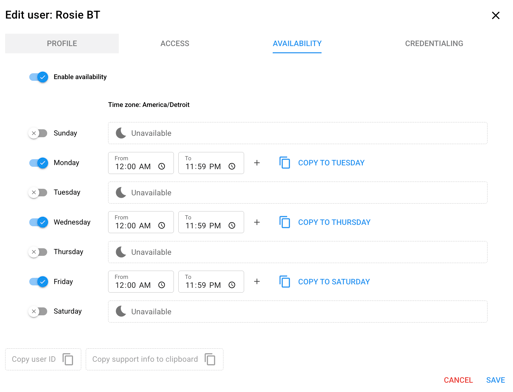
- Edit the hours for each day as needed.
- If their hours are the same across multiple days, use the copy option to apply those hours instead of entering them one at a time.
- If they're unavailable on a certain day, or their hours differ from the rest of the week, edit that day individually.
- Click [Save].
Method 2: From Organization >> Users
- Go to [Organization] >> [Users].
- Click on the staff member's profile.
- Go to their [Availability] tab.
- If this is a new staff member, make sure you've toggled on [Enable Availability].
- Enter their relevant hours.
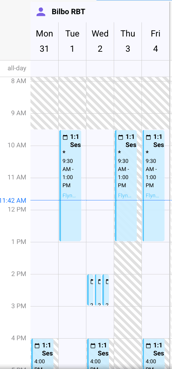
This is a visual indicator only, it does not block scheduling. Once you save, any day or time a staff member is unavailable will show up in their column on the scheduling calendar as darker gray diagonal lines. If your organization's business hours are set up on the calendar, those will still display separately in pink or red.
📹 Watch: Staff Availability in Hi Rasmus
🛠️ Setting Up Client Availability
You can add a client's availability from their profile.
- Go to [Clients] from the navigation menu.
- Click on the client whose availability you want to set. This opens their profile.
- Go to their [Availability] tab.
- Toggle on [Enabled Availability].
- Toggle on each day the client is available.
- Edit the hours for each day as needed.
- If their hours are the same across multiple days, use the copy option to apply those hours instead of entering them one at a time.
- If they're unavailable on a certain day, or their hours differ from the rest of the week, edit that day individually.
- Click [Save].
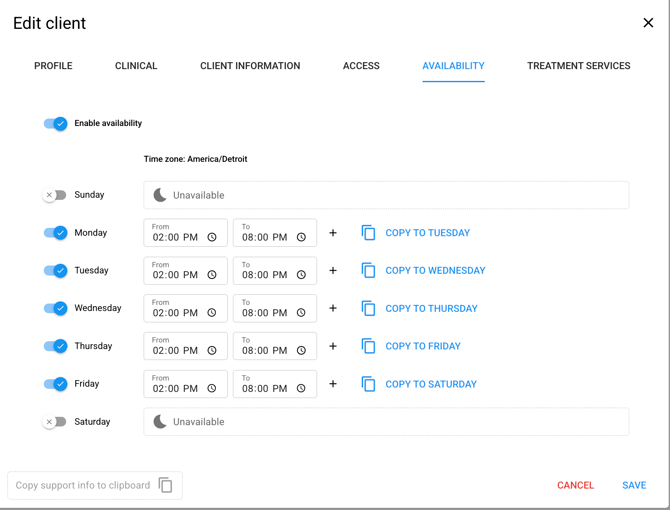
This is a visual indicator only, it does not block scheduling. Once you save, any day or time a client is unavailable will show up in their column on the scheduling calendar as light gray diagonal lines.
🛠️ Setting Up Unavailability Calendar Blocks
You can add an unavailability block directly to a staff member's calendar.
- Go to [Schedule For] and select the relevant staff member.

- Click and drag on the calendar to select the date and time, or click anywhere on the calendar.
- In the scheduling window that pops up, change the dropdown from [Appointment] to [Unavailable].
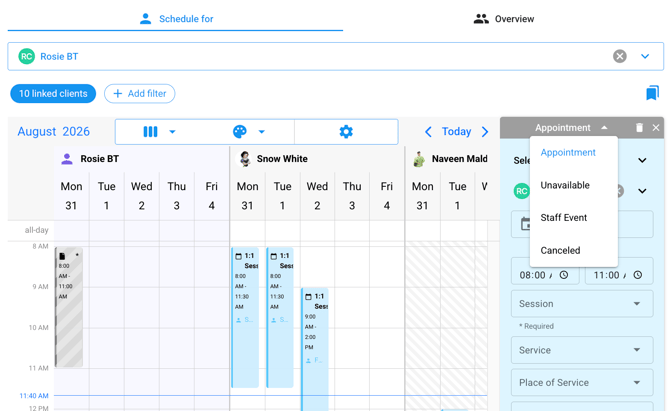
- Adjust the date(s) and time as needed. The title will default to "Unavailable."
- Add notes if needed.
- Set the block to repeat if needed.
- Click [Save].
- Review the changes, then click [Save Changes] to confirm.
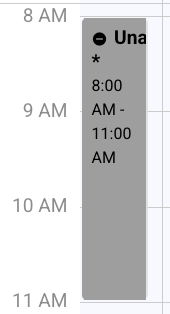
Unavailability won't block scheduling, but if someone tries to schedule over one, they'll get a notification.
Updated August 2026