
ℹ️ Funding sources are available for organizations with the Scheduling tool Add-On.
In this article:
Add a Funding Source
- Select [Settings] >> [Scheduling] >> [Funding Sources] from the left-hand navigation menu. You’ll see a list of any funding sources already added.
- Click [Add Funding Source].
- Enter the funder name in the [Name] field.
- Select the funder type in the [Funder type] field.
- Under Claim submission, select Electronic, Invoice, or Roster in the [Billing channel] field.
- Select who bills for services for this funder: Performer or Organization.
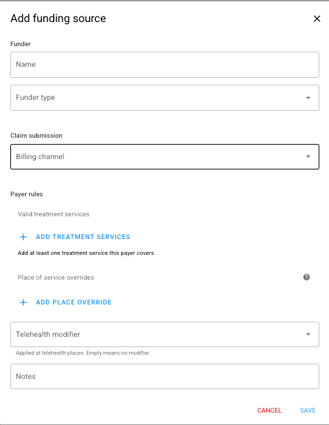
- Complete the Payer rules.
- Choose whether you’d like to be able to bill this funder without an authorization.
- Click [+ Add Treatment Services].
- Select all of the treatment services for this payer. You can select several at once.
- Click a treatment service row to expand it.
- Add any modifiers this payer requires for that service in the [Modifiers] field.
- Click [+ Add Place Override].
- Select the place of service.
- Enter the POS code this payer requires.
- Telehealth Modifier
- Select 95 or GT in the [Telehealth modifier] field, if applicable.
- Leave the field empty if this payer does not require a telehealth modifier.
- Add any notes in the [Notes] field, if applicable.
- Click [Save].
- Choose when the funding source takes effect: starting today, or on a specific date.
- Click [Continue]. The funding source will now show in your list.
Edit a Funding Source
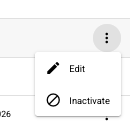
- Click the pencil icon to the right of the funding source.
- Make your changes and click [Save].
- Choose when the changes take effect: starting today, or on a specific date.
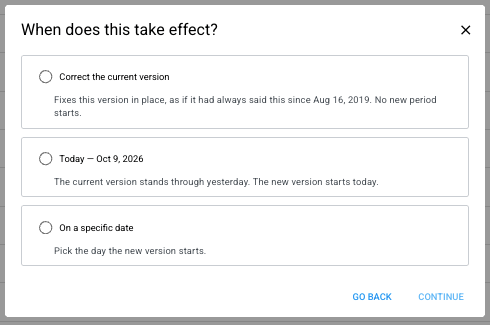
- Click [Continue].
💡 Sessions dated before the effective date will follow the earlier settings. Sessions on or after that date will follow the new ones.
Inactivate a Funding Source
💡 Once a funding source is inactivated, it cannot be reactivated. You would need to add a new funding source.
- Click the pencil icon to the right of the funding source you want to inactivate.
- Click [Inactivate].
-Updated October 2026