Quick Navigation Links
📽️ Watch the video below for an overview on how to manage user privileges, enable or disable notification settings and create new user roles.
Accessing User Privileges
ℹ️ Manager level users are the only role that can access and adjust user privileges in Hi Rasmus.
Your organization must have at least 1 manager-level user.
1. From the left hand navigation menu, select [Settings] >> [Organization] >> [User Privileges]

2. Select the [Privileges] tab to view user permissions or add an additional user role.
3. Select the [Notifications] tab to view notification settings by role.
- To view a role's notification settings, select the role from the dropdown menu in the top left corner of the table.

User Privileges: Viewing Role Access
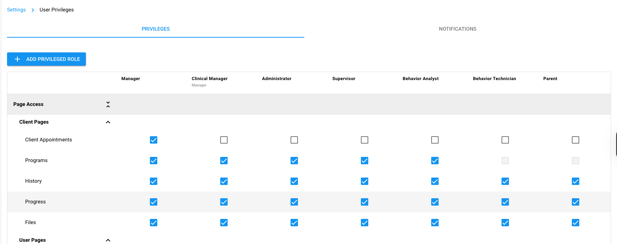
With the updated User Privileges layout, you'll easily be able to see from a birds eye view which roles have which permissions, in an easy to read table format.
- User roles will be listed across the top of the table.
- Click the ✏️ pencil icon to edit a role name or the 🗑️ trash can icon next to a role to remove it (you can only remove roles you have created).
- For any custom roles, or roles in which you've changed the name, the name of the base role will be listed underneath the updated role title.

- The far left column lists the different access / permissions categories.
- Select the arrows next to each category to expand the list of permissions in that category.

- Check boxes under each role specify if that user role has a permission enabled.
 A blue box with a check means the user role has the permission enabled
  A white box means the user role does not have that permission enabled, but it could be enabled for that role
 A greyed out box means that the user role cannot have that permission enabled.
 - A light blue box that is checked on, means that the permission cannot be disabled for that particular base role.

- Clicking the
 icon next to each permission will display a pop up with details about the permission. Click OK and the pop up will go away.

User Privileges: Adding a Custom User Role
1. To add a custom user role select [Add Privileged Role]

2. Select the Base Role that you would like the custom role to be built off of. Keep in mind that whichever permissions are locked on or off for the role, will not be editable.
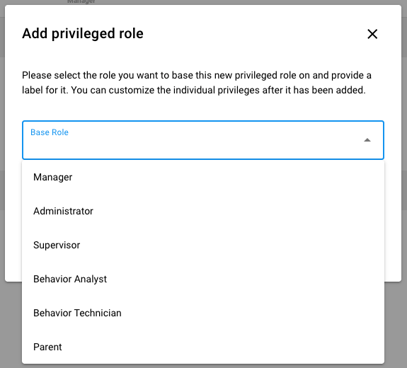
3. Enter a Role Label - the title you would like to give the role.

4. Select [Add]
Pro Tips:
- There is no need to press save. Any changes made will automatically save!
- Click on tool tips to see details on a specific permission