Set Up a Skill Acquisition Program
With a client selected:
- Select [Programs],
- [Add Program]
- [Skill Acquisition]

This will open the programs page. First, type in your program name.
Then you will see 4 tabs: [Treatment], [Instructions], [Targets], [Data Recording]

Quick tip: Add a cover photo
Add a professional, inviting appearance to any of your programs with a cover photo. Select the ![]() icon to the right of your program's name, and you can upload a picture. This can make navigating programs from your client's home page more user-friendly and welcoming.
icon to the right of your program's name, and you can upload a picture. This can make navigating programs from your client's home page more user-friendly and welcoming.
Treatment Tab
On the treatment tab, you can fill out the treatment areas, measurement, mastery workflows, and program data fields. These are customizable for your organization. Read more information on setting those up for your account here:
Instructions Tab
On the instructions tab, you can fill out instructions for your program. You can add program data fields here as well (see linked article above on program data fields).
Information on this tab will be available to staff during the session, so you can include any instructions applicable to that program
Instructions can be formatted as fits best using headlines, bold text, lists, etc.
Quick tip: Avoid formatting issues.
If you are pasting text from Word or another program you can press Shift+Ctrl+V (PC) or Shift+Cmd+V (Mac) to prevent the original text formatting from messing up the instructions when shown on Hi Rasmus.
You can also add videos or treatment materials here
If you access the Hi Rasmus platform from a smartphone or tablet, your camera application will be opened automatically when clicking Upload Instruction video.
Targets Tab
On the targets tab to set up targets (or short term goals) for the program. This is what you will collect data on. As you add new targets you can select the current status for each target. The platform will automatically record the introduction date for each target the first time data is recorded for the target.
Quick tip: Add new targets by pressing Enter.
When you have finished adding a target, simply press Enter on your keyboard to add another one immediately. This will speed up the process as you build a program with many targets.
The targets will be set to Waiting by default. Read more about targets and their lifecycle.

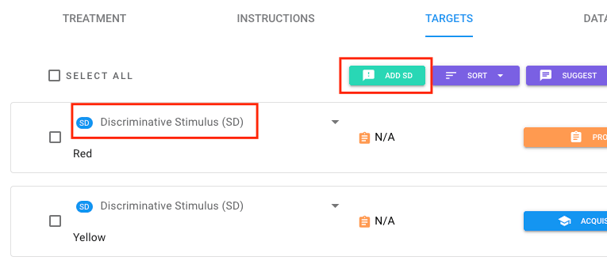
💡Add an Discriminative Stimulus!
Adding an SD leaves clear instructions for users and makes running programs easier! The SD will show up on the session above the target name can be added (and varied, if need be) for each target.
Select [Add SD] and type the SD into the box above the target
If all targets on a program have the same SD, you can bulk update by selecting all targets and then [Set Discriminative Stimulus]

💡AI Target Suggestions!
Click [Suggest] to use AI target suggestions! Enter a prompt into the pop up box to generate suggestions, then import them as targets!


Data Recording Tab
Select the Data recording option to configure the prompt levels for this program.
Running a skill acquisition program
When you run a session with a skill acquisition program, you can record data by clicking the individual target and then selecting the level of prompting used during the trial. You can record an unlimited number of trials for each target. The platform will automatically keep track of the recorded data so you can analyze it as needed.
Data recorded in the individual sessions can be viewed in the client's History  .
.
Monitoring progress
To monitor the client's progress, go to their Progress  section. You will see an overview of the accumulated number of targets mastered over time. You can also drill down into the individual program to see target mastery on the individual program including the introduction dates and mastery dates.
Types of Targets
When creating a skill acquisition program, users have the opportunity to create different target types within the same program!
To do so, when adding a target, you will click on the arrow located on the right side of "Add Target". That will give you a drop down menu with all the options.
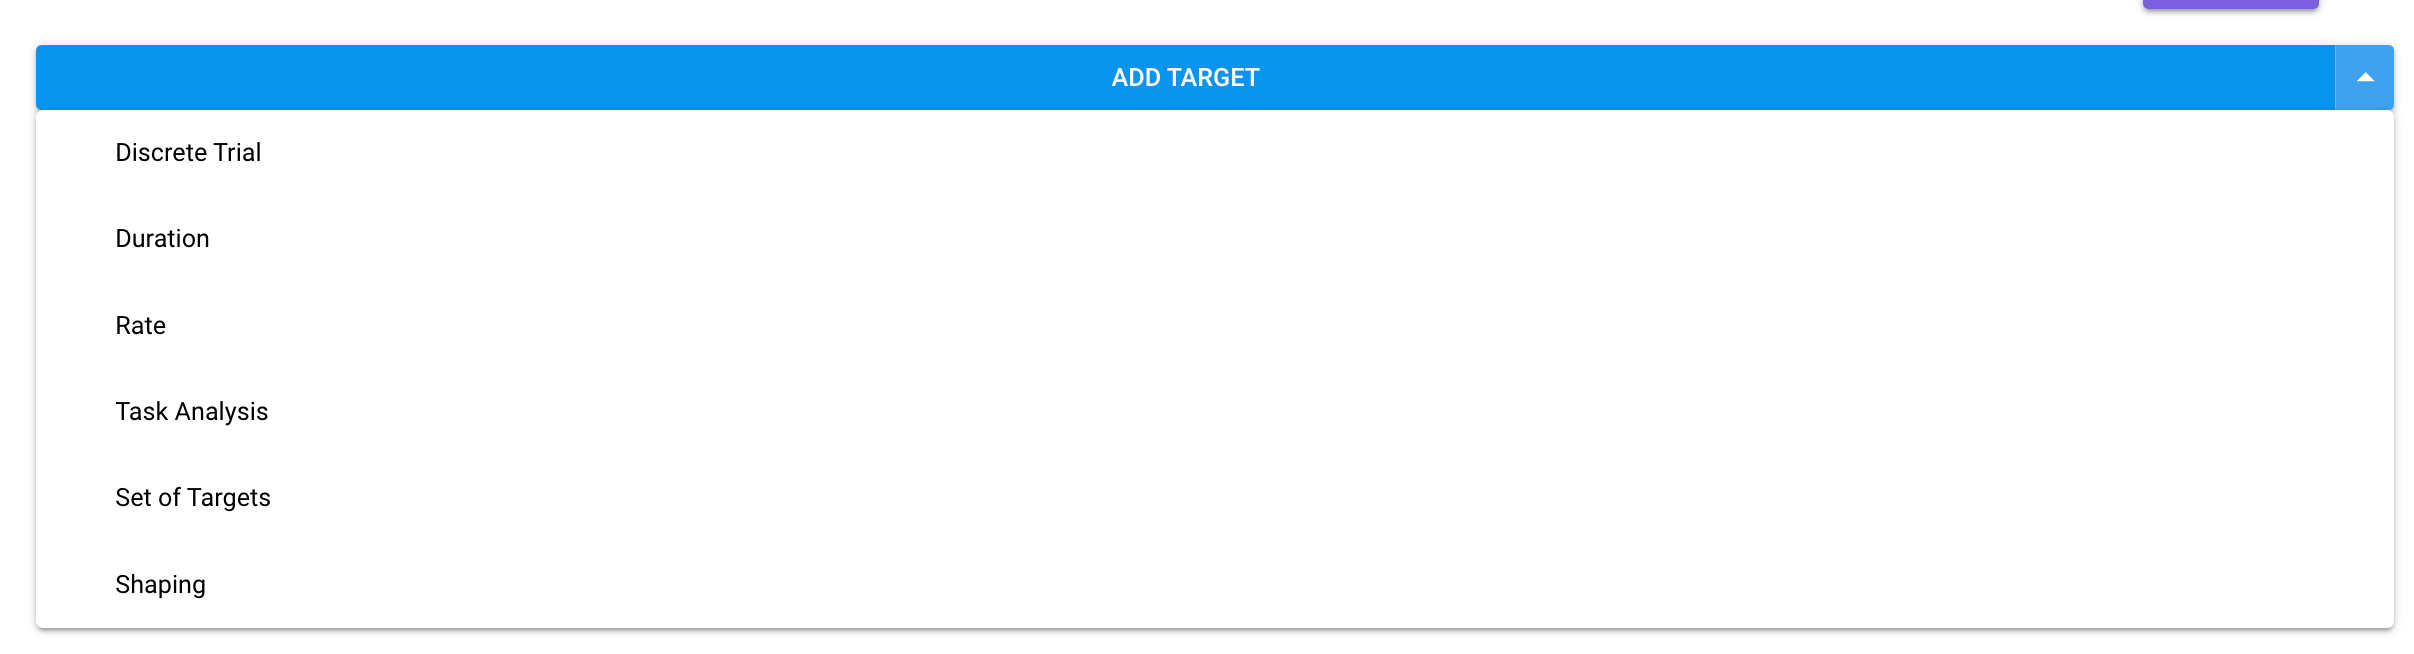
Below you can see an example. The program's name is Morning Classroom Routine. The types of targets used on this program are Discrete Trial, Duration, Rate, Task Analysis and Set of Targets. You can set it up the way it works best for you!
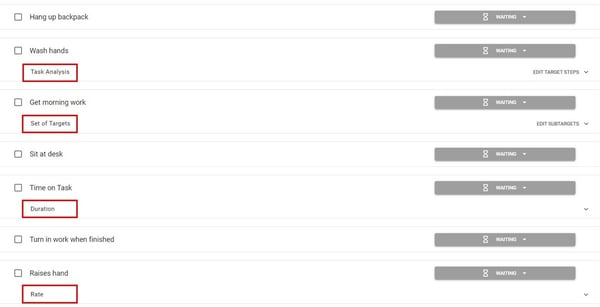
Note: If selecting target types with different measurements (e.g. percent correct and duration), the program graph will not accurately reflect all of the program data. You will need to use the target level graphs for data analysis
-Updated October 2025