Set up a task analysis program
- Select [Programs]
- Select [Add Program]
- Select [Task Analysis] in the drop-down menu
- Enter the Program Name
- On the [Treatment] Tab, confirm the [Measurement] is correct; it will default to [Percent Correct].
- (Optional) Select the mastery workflow you would like to use. If you want to learn in detail how to set up mastery workflows, you can read it in this knowledge base article.
Quick Tip: When setting up your workflow for task analysis, under ![]() , you will determine which direction you want the program to open new steps/targets in. You need to put a check mark in this section to automatically open new targets when targets are mastered.
, you will determine which direction you want the program to open new steps/targets in. You need to put a check mark in this section to automatically open new targets when targets are mastered.
Max number of targets in probe and acquisition phases depend on your type of chain (1 if it's a forward or backwards, total # of steps if it's a total task)
Direction:
Open first waiting target- Forward Chaining
Open last waiting target- Backward Chaining
Open all waiting targets- Total Task
7. Select the [Instructions] tab to enter the instructions for the clinicians.
8. Select the [Targets] tab to add the steps of your Task Analysis program
9. Enter the steps in order for the task analysis from top to bottom. If you forget a step and/or need to add a new one, you can easily rearrange the order of targets by clicking on this icon ![]() located to the left of the target's name, and drag the target up or down to the desired step in the total chain.
located to the left of the target's name, and drag the target up or down to the desired step in the total chain.
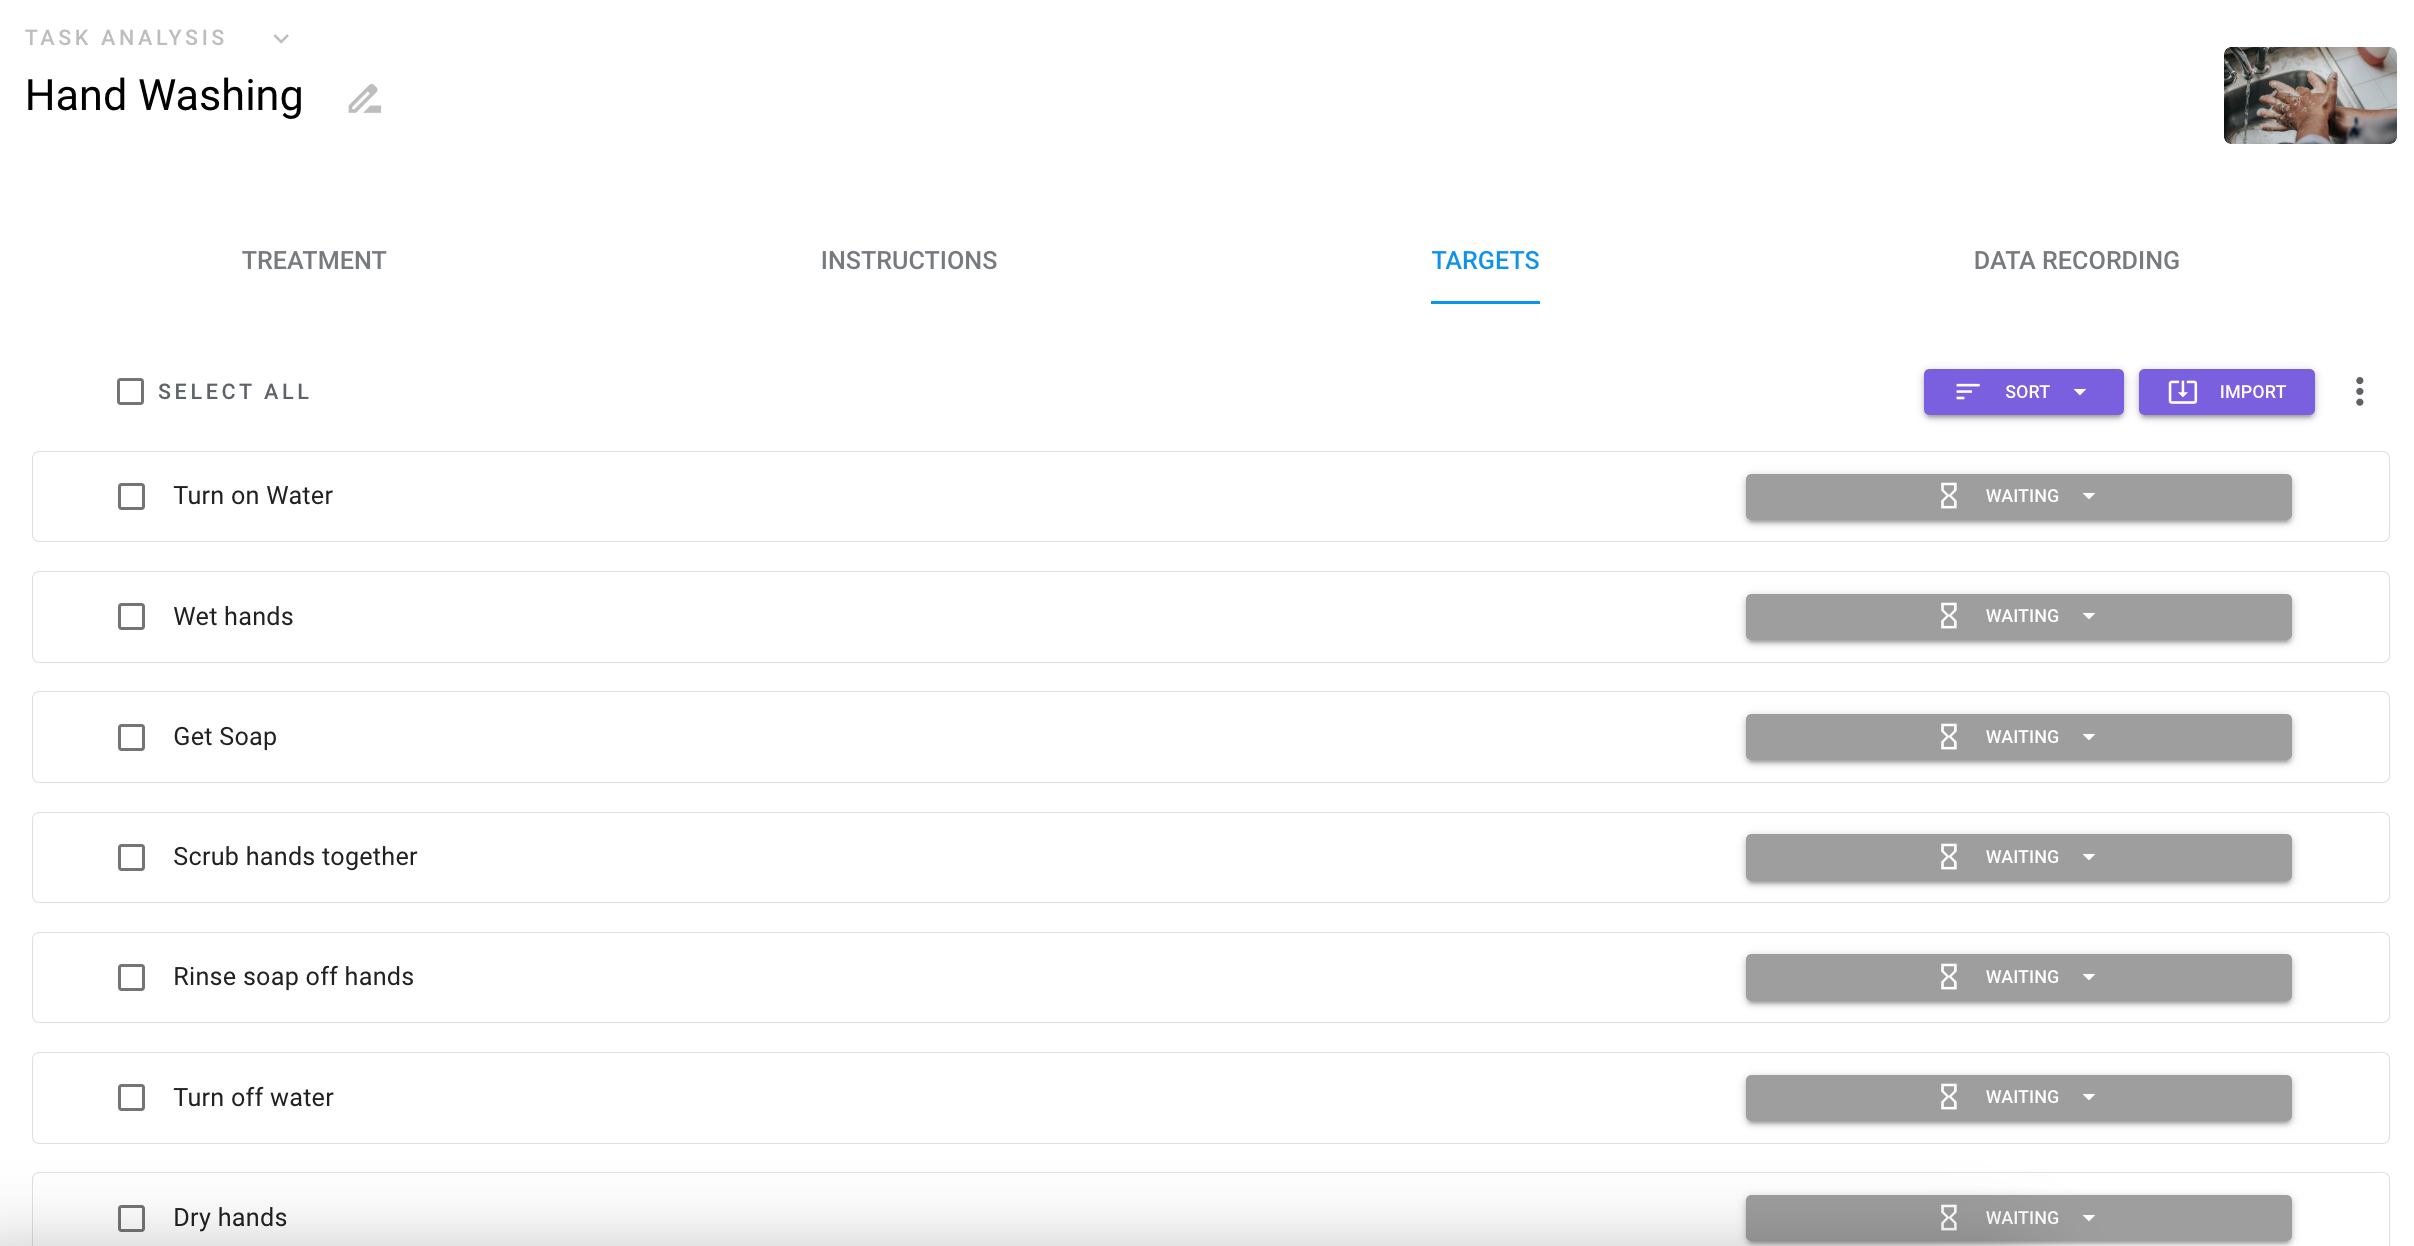
10. Depending on the type of Chain you want to run, either open the first step, the last step, and/or all the steps at once into probe and/or acquisition by selecting the drop grey box that says waiting.
11. Next, select the prompt level template. Once this is chosen, it is optional to select a default observation status. Should you select a default observation, this is the response that will remain for the target unless an observation is recorded. So If a step is skipped, the default observation would be marked as the response rather than no response. 
To learn more about setting up Prompt Level Templates, click HERE
12. Once complete, select [Save].
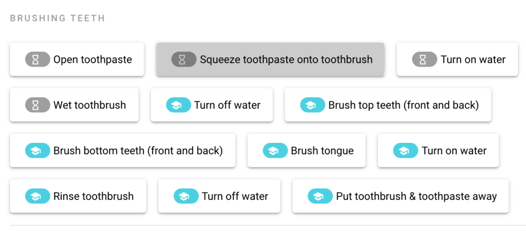
Including "Waiting" Targets in Sessions
If you would like your user to see all steps within a Task Analysis program, without the ability to collect data on those steps that are not yet being targeted, try this:
- From Programs
 > (Your TA Program) > Targets, ensure that steps that are currently being taught are set to "Probe" or "Acquisition". You will be able to collect data on these targets during sessions. All currently inactive steps should be set to "Waiting".
 - From your client's Home
 page, add your new program to an existing session by finding the program listing and selecting
  . (If the program is part of an existing session you can select the
  icon on the session listing and choose
  Edit Session.
 - The Session Tab, now present on the bottom of your screen, will show you all of the programs within a given session. On each program listing, you will see icons representing the number of targets in Waiting, Probe, Acquisition, and Mastered status. To include Waiting targets in a session, simply click on the gray icon. (This process can also be followed for Mastered or other categories as well).
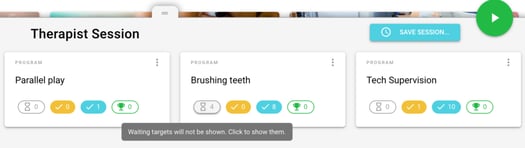
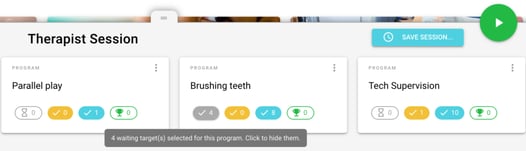
Once a session is in underway, these targets will be visible, but the user will not be able to select or gather data until those steps are moved to an active probe, acquisition, or mastered status.
-Updated October 2025