NEW: Prompt Level Templates can be customized on the Client Program Level!
Quick Navigation Within this Article
Overview: Prompt Level Templates
Creating Prompt Level Templates: Video Overview
Creating Prompt Level Templates: Written Instructions
Prompt Level Template Settings
Prompt Level Template Customization on the Client Program Level
Overview: Prompt Level Templates
Prompt Levels are required to record data on any program that is not an instructions only or ABC data collection program.
- Manager and Supervisor level users in Hi Rasmus can manage an organization's prompt level templates
-
Prompt levels are added to each program via the [Data Recording] tab or specified within a target's settings on a Skill Acquisition program.
-
Prompt levels can be customized. Clinicians can hid the prompts they are not using within that template on the client level per program, so you'll want to ensure you have multiple prompt levels to select from based on your organization's needs.
-
-
You can access a few basic prompt level template options by adding the program Starter Pack via the Catalog in your Library or when you first set up your account.

ℹ️ CLICK HERE to learn how to add Prompt Level Templates to programs.
📹 Creating Prompt Level Template: Video Overview
Creating Prompt Level Templates: Written Instructions
1. From the left navigation menu navigate to [Settings] >> [Programs] >> [Prompt Levels]

2. Select [Add Prompt Level Template]

3. Enter a name in the [Template Name] field.

4. To add Prompt Level options select [Add Prompt Level].

5. Enter a Prompt Level option:

- Enter the name of the Prompt level.
- Toggling on [Successful outcome] will automatically turn the prompt response color to a pale green.
- You can change the color of the prompt level option by selecting the dropper icon and choosing a different color.
-
- 💡 Color coding your prompt level options makes it easy to distinguish from other prompt level options when taking and analyzing data.
ℹ️ A Few Notes on Toggling on [Successful Outcome]:
- When a prompt level option is marked as a [Successful Outcome], that recorded response will count positively towards mastery and will display as an occurrence on a graph.
- If you do not have [Successful Outcome] toggled on for any prompt level in your template, your graph for that program will display no successful outcomes even if data was collected. The graph will display "0's".
- There is also the option to weight each prompt levels response. To learn more, visit the section in this article titled Prompt Level Template Settings.
6. If applicable, add your additional prompt levels by selecting [Add Prompt Level]

7. To reorder your prompt level options, select the up/down arrow icons to the far right of the prompt level.
- Select the red trash can icon to remove a prompt level option altogether.

8. If you'd like to set the prompt level template as the default template when creating new programs, toggle on [Use as default template when adding new programs].

9. Select [Save]
Prompt Level Template Settings
The Advanced Settings on a Prompt Level Template allow you to specify:
- Successful / Unsuccessful Outcome Measurement OR Weighted Outcome Measurement
- Automatic Prompt Level Fading Hints
ℹ️ To learn more about using a Prompt Level Template to set up Automatic Prompt Level fading hints for your users CLICK HERE
To Access Prompt Level Template Settings:
1. Within your Prompt Level Template, select the gear icon next to the Template Name.

2. Select [Outcome Measurement] if you'd like to switch your response options from a simple [Successful / Unsuccessful] outcome to a [Weighted] outcome.

- Selecting [Weighted] will allow you to define a percentage for each response option of your prompt level.

3. Select [Automatic Prompt Level Fading Hints] to set up automatic hints that can guide or require a provider to select a particular prompt level based on the prompt fading criteria you specify.

ℹ️ Check out our KB Article on Automatic Prompt Level Fading for more details on setting up these prompt fading hints
Prompt Level Template Customization on the Client Program Level
📹 Watch: Customization of PLT on the Client Program Level
1. Navigate to the client program that needs editing (select the client in the dropdown in the top left-hand corner, select the [Programs] tab, click on the program.)
2. Select the [Data Recording] tab
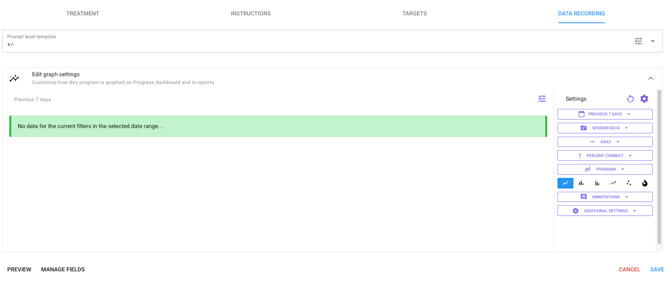
3. Click the 3 lines in the far right-hand side of the Prompt Level Template

4. Adjust the prompt level template as needed, users can hide prompt levels by clicking on the "eye" icon. Users can adjust the order of the prompt level template by clicking on the up and down arrows to the left of the "eye" icon.

5. Hidden prompt levels will now show up in their own section at the bottom of the page.

6. After all edits have been made, select [Save].
7. Now the prompt level template will display a symbol "!" indicating a change.

NOTE: If you reselect the prompt level template from the dropdown list, it reverts back to the original template.