Step 1: Navigate to Workflows
Step 2: Select the Percent Correct Workflow
Step 3: Configure Workflow Phases
Step 4: Save Your Workflow
Understanding Minimum Number of Trials
Step 1: Navigate to Workflows
-
Go the [Settings]
-
Select [Programs]
-
Select [Workflows]
🔒 Note: Only users with Manager or Supervisor access can create or edit workflows.
If you need to give or restrict this permission for user roles, refer to the User Privileges article for guidance.
Step 2: Select the Percent Correct Workflow
-
Locate [Percent Correct] in the list of workflow types.
-
Click the [drop-down arrow (▾)] next to Percent Correct to expand the options:
- Increase Percent Correct
- Reduce Percentage
- Select the percent correct workflow that supports your client’s desired outcome
Step 3: Configure Workflow Phases
Each phase determines when a target advances based on the criteria you set.
1. Probe
Used to collect baseline data or assess initial performance of a target
This phase is optional- it can be removed from a workflow and/or re-named by selecting the pencil icon to the right of [probe].
Modify the color, icon, and name of the workflow phase by clicking the pencil icon.
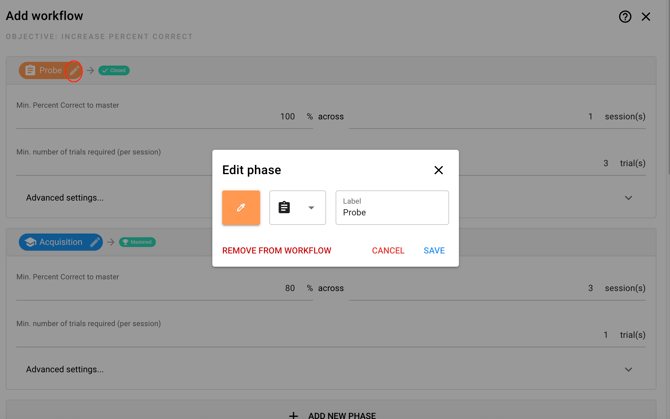


TIP: Customizing the color, icon, and name of the phases can help your staff more easily identify what each phase means.
- For the [Probe] section, add the percent correct for mastery and minimum number of trials per session across the total number of sessions in order to consider the target mastered.
- Select [Advanced settings...] to determine
- What will happen with the target if it is not mastered: If not mastered, a target can either go to a [waiting] status (meaning it will not be worked on until opened) or to an [acquisition] status(meaning it will be worked on for continued teaching)

- What will happen with the target if mastered: a target can be [closed] (meaning it won't appear in the session again), it can be [mastered] (meaning you can set a maintenance schedule) or it can go to [acquisition].

- Additionally, there is the option to automatically add a phase change line when a target automatically moves into [Probe]. The default name will be Probe, but you can change it if necessary.

- What will happen with the target if it is not mastered: If not mastered, a target can either go to a [waiting] status (meaning it will not be worked on until opened) or to an [acquisition] status(meaning it will be worked on for continued teaching)
🚨This phase change line will ONLY show up on the Target Graph, NOT on the program graph. The phase change line will ONLY show up when part of automation. Should you manually put a target into [Probe], the phase change line will NOT automatically show up on the graph.
2. Acquisition
Represents the teaching or intervention phase
This phase can be re-named and the icon and color can be modified by selecting the pencil icon to the right of [acquisition]

- For the [Acquisition] phase, add the percent correct for mastery and the minimum number of trials required per session across the number of sessions in order to consider the target mastered.
- Select [Advanced settings...] to automatically add a phase change line when a target automatically moves into [Acquisition]. The default name will be Acquisition, but you can change it if necessary.

If you'd like to add multiple [Acquisition] phases you can select [Add New Phase] and name the additional phase whatever you prefer. Then fill out similarly to your first acquisition phase.
3. Mastered
Indicates that a target has met mastery criteria and is no longer actively taught. This target is now placed on an interval schedule.
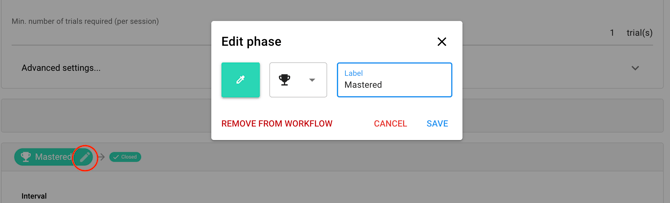
This phase is optional- it can be removed from a workflow. Additionally the name, color, and icon can be modified by selecting the pencil icon to the right of [Mastered]
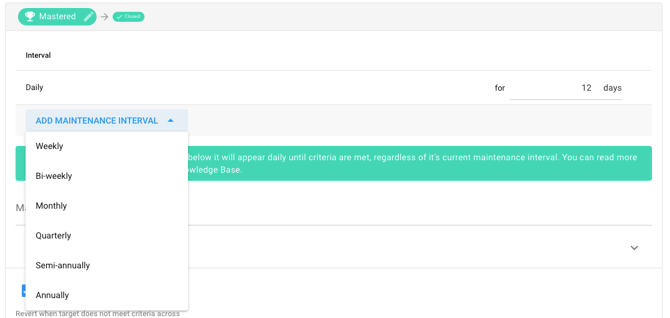
- The workflow will default to a [Daily] interval of 12 days. To add additional intervals or remove [Daily], select [Add Maintenance Interval]
- Set a mastering percentage
- Set a minimum number of trials required per session
- Select [Advanced settings...] to automatically add a phase change line when a target automatically moves into [Mastered]. The default name will be Mastered, but you can change it if necessary.

- Additionally, there is an option to Revert a target's status from Mastered to Acquisition when the target does not meet criteria. Enable this and determine the number of sessions for this to occur.

4. Automatically Open New Targets
This is optional, but when enabled, Hi Rasmus will automatically open the next target in the program once a previous target is mastered. This ensures continuous progress for a program. Please click here to read more on this section.
Step 4: Save Your Workflow
After defining all phases and settings:
-
Review your workflow setup to ensure each phase’s criteria are correct.
- Create a name for the workflow
-
Click [Save] to apply the workflow to your organization’s library.
Once saved, your Percent Correct Workflow can be selected when creating or editing programs.
Understanding Minimum Number of Trials Criteria
*These options are ONLY availabe if you assign a percent correct workflow.*
"Below Min Trials" badge in session history data review:
After a session, targets that did NOT meet the minimum trial count when assigned a work, display a badge, making it easy to spot under-run targets without digging into the data.
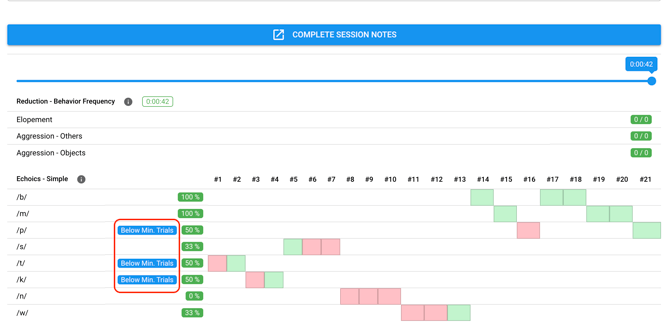
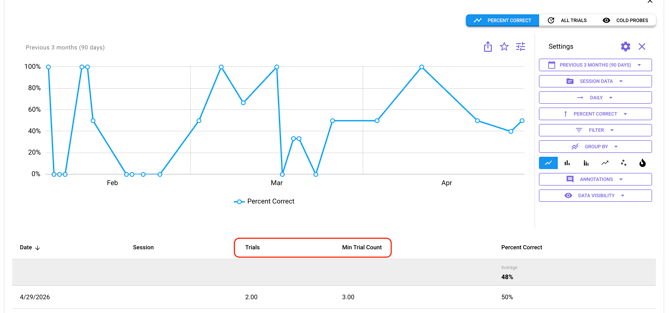
The data table below the target graph now shows how many trials were collected in each session alongside the minimum required, so you can see at a glance which sessions met the threshold.
Click HERE to review the graph settings on how to hide the minimum number trials on a target graph when not met. The toggle to hide the data can be found in the [Data Visibility] settings on the graph.