Navigating the platform as a Manager Level User
Learn how to navigate Hi Rasmus as a Manager Level User!
Video Walkthrough
Watch the video below for a full tour of the system as a manager level user!
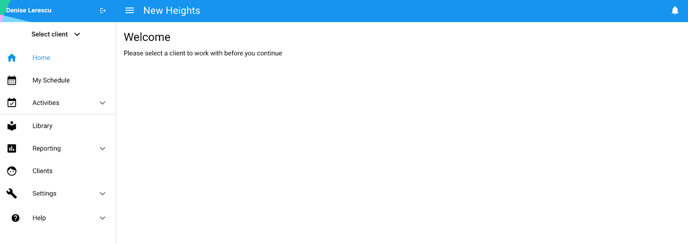
User Home Screen

Blue Banner:
- Your name along with your organization's name.
- Clicking your name will take you back to "your" home page.
- To sign out, click
 .
. - To hide/ unhide the left hand navigation menu, click
 .
.
To view notifications that need your attention, click 
Left Hand Navigation Menu:
- The [My Schedule] page won't be turned on by default.
- To turn it on, go to [Settings] >> [Organization] >> [User Privileges]
- Under the section heading [Page Access], click on the sub-section [User Pages]
- To enable the [My Schedule] page for different user roles, click the box beneath that user role. Once selected, the user will be able to view the [My Schedule] page on their homepage.
- 💡TIP: The [My Schedule] page will allow users to view their individual scheduled appointments (daily, weekly, monthly) and start a session from the page.
- The [Activities] page allows you to view all of your own activities and any pending signature requests.
- The [Library] page allows you to view and/ or create your organization's curriculum, or view the Hi Rasmus catalog.
- The [Reporting] page is only available with Premium Client Licenses.
- Review user and client activities and auditing across your entire organization.
- ℹ️ Click Here for more information on how to utilize our Activities Reporting and Auditing across clients.
- The [Clients] page allows you to view your client’s profiles, and add new clients.
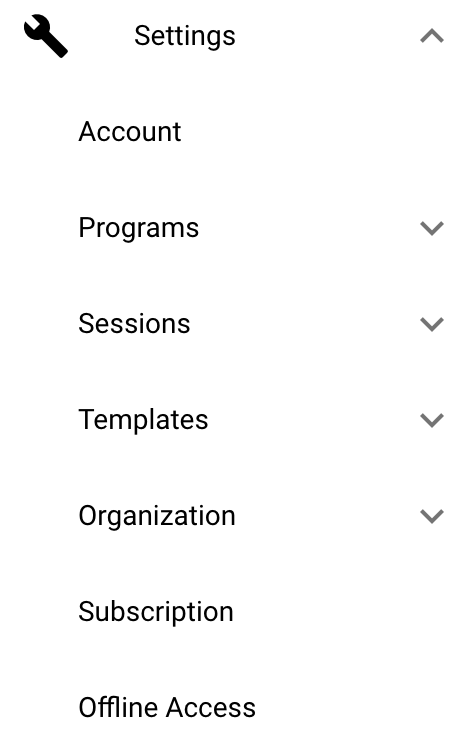
- The [Settings] page allows you to manage the following:
- Account: View and edit your user account information, such as email and password
- Programs: Manage Program Building Blocks such as: Treatment Areas, Tags, Prompt Level Templates, Workflow Templates, and Program Data Fields.
-
- Sessions:
- Session Prototypes (Premium Only) allow you to apply naming conventions and settings to client sessions across your organization.
- Supervision Mode (Premium Only) allows you to set up a default note template for supervisors when using supervision mode.
- Templates: Manage your Note, Report and Form Templates
- Sessions:
-
- Organization: Manage Users, User Privileges, Business Units, Client Information Fields, Staff information Fields, Single Sign On and Integrations.
- Subscription: Manage your organizations subscription and licenses.
- Offline Access: Choose which clients you want to be able to take data with offline

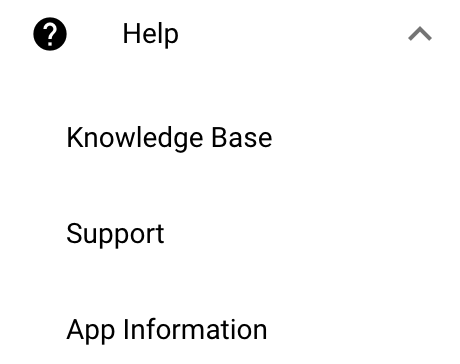
7. Visit the [Help] page to easily access our Knowledge Base, access support information, request a feature or view App information, including the version of Hi Rasmus you are using.
Client Page Navigation
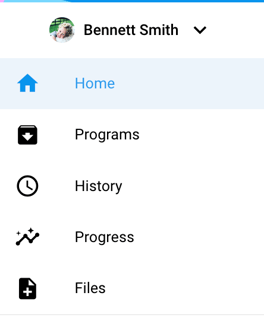
To begin working with a Client, select their name from the [Select Client] dropdown:

Note: Every page above the [Library] tab is a Client or User specific page.
Every page below the [Files] tab is an organization-wide page.
-
Home
 is your overview for the client you have selected. On the homepage you can see scheduled sessions and the current programs for this Client. The homepage is also where you create new sessions.
 - Appointments
 is where you can view all Client specific appointments that have been scheduled, either in Hi Rasmus or with an integration partner.
-
Visit Programs
 to set up and customize programs, objectives, and targets for the selected client.
-
History
 is where you can go to review past sessions. This gives you easy access to detailed data recorded during prior sessions and any session notes.
-
Progress
 allows you to view graphs and monitor your client's progress over time across all programs.
-
Files
 is where you can upload and share documents that are important to your client's case.
-Updated November 2025

